Pages

Sunday, October 14, 2012

Out with the Old and in with the Older!

When we moved into this house, I knew I wanted to find an old farm sink to replace the one that was there. I knew just the place to get that farm sink too! A few weeks prior to this photo I had made the trip to Andalusia, Alabama to Sweet Gum Bottom Antiques and picked up my farm sink....and a few other goodies :-). We'll get to those goodies later.

Anyway, this house was my best friends grandmas house.....and I'm pretty sure this sink was the original sink. I am also pretty sure that everyone in her family was bathed in this sink at some point and time.....or so they tell me. The sink had to go. It had done its time


Apparently it was more ready to go than I realized.....


As I was washing dishes one afternoon, I turned the hot water faucet off and it BLEW off the sink! Hot water was gushing out everywhere! I grabbed a tea pitcher and stuck over the water so it wouldn't go everywhere. My husband went to turn off the water and hmmm.....there was no emergency shut off valve. Gotta love old houses. He had to shut the water off at the main supply. It is REALLY awesome to have a husband that can fix anything and do anything....because within 45 minutes he had installed new shut off valves under the sink. He is awesome!

The handle had literally just corroded off. It had no threading left at all.


You can see how corroded it was. We went ahead and ripped it all out!


I wasn't good at photographing the new sink install.....because I was busy trying to get it in. My husband had to go in on nights that particular night so we didn't have but about an hour and half to get it all done. He had to cut the back splash out to get the new sink in. A lot of work to do in a short period of time.


So here is the new sink today. I absolutely LOOOOVE it!

I haven't done anything in the yard yet....it's hard to dig holes when you are 6 months pregnant. I am getting areas ready to make flower beds in the spring. We do have some things to start out with....


the Confederate Rose is loaded with blooms

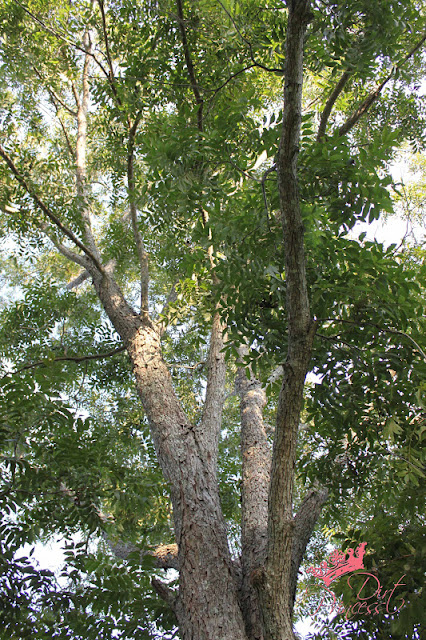
We have several pecan trees........ 


...and have been picking up pecans by the buckets full.


I'm not sure what kind of rose this is. Is is a low bushy shrub...pretty large size. The buds are fairly small. It is really pretty though.


The bush is loaded with buds.


We also have several sasanquas and camellias. The sasanquas are also loaded with blooms.


Hopefully they will be blooming soon!

I am going to link up with Tootsie for Fertilizer Friday.....I don't have much to show for now but it's a start!

Tuesday, October 9, 2012

Roughin' Things Up

It's been so long since I have done a blog post I forgot how to use this new interface! Guess I need to start blogging more!

Well the house has come a loooong way since I took these pictures, so I will try to catch you up!

The first thing I wanted to do when we moved in was paint the cabinets....

They were a dark stain, and I just couldn't live with it. The living room walls are knotty pine and it opens to the kitchen. It was wood overload and I needed to break it up!


I decided to keep the existing cabinet pulls...they aren't exactly my favorite pulls in the world, but they will do for now.


We took out that old bar that was under the window (next photo)....


remember this one.......and it REALLY opened it up!


I wanted to paint the cabinets a blue color. I decided to use Annie Sloan chalk paint in Provence. I had not seen it on anything in person, just in photos. So I was really hoping that it was going to be what I wanted after spending all that money on it. If you have ever used her paint you know it is NOT cheap!

This is the actual paint swatch


This is after two coats of JUST paint. It looks really pale in this photo...it must have been the lighting. I bought the antiquing wax and regular wax to put on the cabinets. I tried in on the left cabinets in the photo above and HATED it!!! First of all it took way too long and my first child would have been born before I got through waxing all those cabinets, and second of all the antique wax was hideously ugly.  Ugly as in it looked like my house had caught on fire and the cabinets were covered in ashes. UGLY!


I couldn't live with that look so I scrubbed it all off and painted over it.  


It was still in progress when I took this photo


After I got my two coats on and they were completely dry, my awesome husband went around with sand paper and roughed the edges up for me. He did a pretty good job. I helped for about 5 minutes, then we determined that he was a better "antiquer" than me!


So while he roughed them up, I swept up all that dust. Luckily we hadn't moved in yet because that was a DUSTY mess!


You can see the difference here....the top cabinets have been "roughed up" and the lower ones have not been touched yet. After we finished this up, I sealed the cabinet with Minwax polyurethane.
That made them a richer shade of blue....which looks really good!
 The top coat made it closer to the shade on the paint swatch.

Next to go would be that sink!!!!! I will share that debacle with ya'll later in the week!


Please sign my guest book :)

Blotanical

Blotanical

Translate

My Blog List

My Blog List